
Scheduling and arranging meetings can be a real pain. We’ve all been there, the constant back and forth between different parties trying to arrange a suitable time slot. It wastes precious time that could be used for doing something more productive.
Luckily, technology can come to our rescue. There are some fantastic tools available that can make scheduling a breeze, and sometimes even automate the whole process so you can sit back whilst your meetings get scheduled without you having to lift a finger.
There are several tools out there but the two specific ones we are going to focus on in this article are Microsoft Bookings and Microsoft FindTime.
What are Microsoft Bookings and FindTime?
Bookings and FindTime are tools that are designed to help make meeting scheduling easier. Bookings involves allowing other people to book slots of time with you when you are available and automatically set a calendar appointment for both people.
FindTime is designed to help groups of people agree on a meeting time by carrying out a quick survey and picking the best option.
What is Microsoft Bookings used for?
Microsoft Bookings is used for simplifying appointment bookings between you and your clients. Rather than having lots of back and forth via e-mail or phone to arrange a suitable time, Bookings lets your clients see what time slots are available in your calendar and allows them to choose the one that’s most suitable for them. Once chosen, the calendar appointment will be booked and you both get e-mail confirmation with the meeting time and date. This can save a huge amount of time for both parties.
How to use Microsoft Bookings
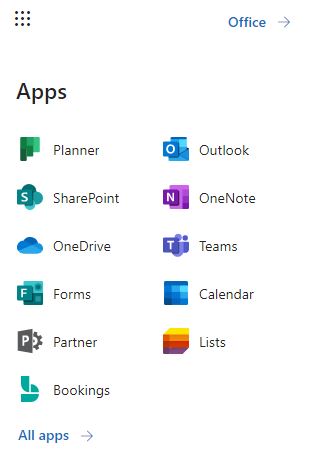
To start using Microsoft Bookings you will need a valid Office 365 subscription. Sign into the Office 365 portal here. Click the waffle and select Bookings from the menu.
To allow people to see your availability, you need to create a new Bookings Calendar. Click the button to add a new calendar, then enter your chosen calendar name and available business hours.
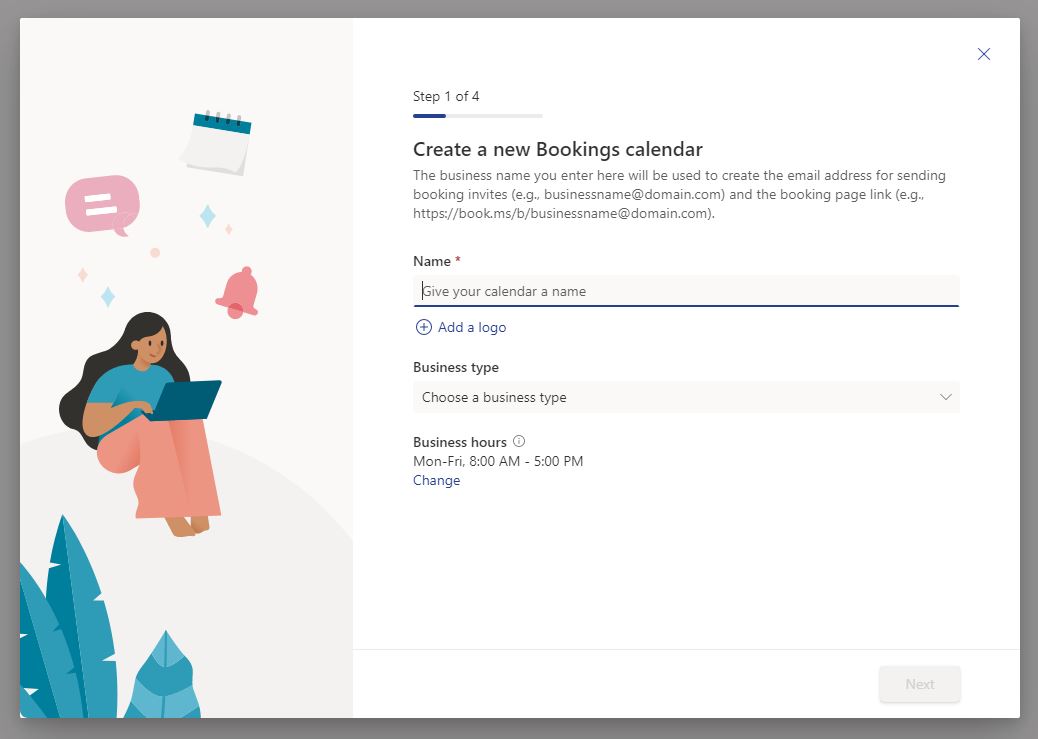
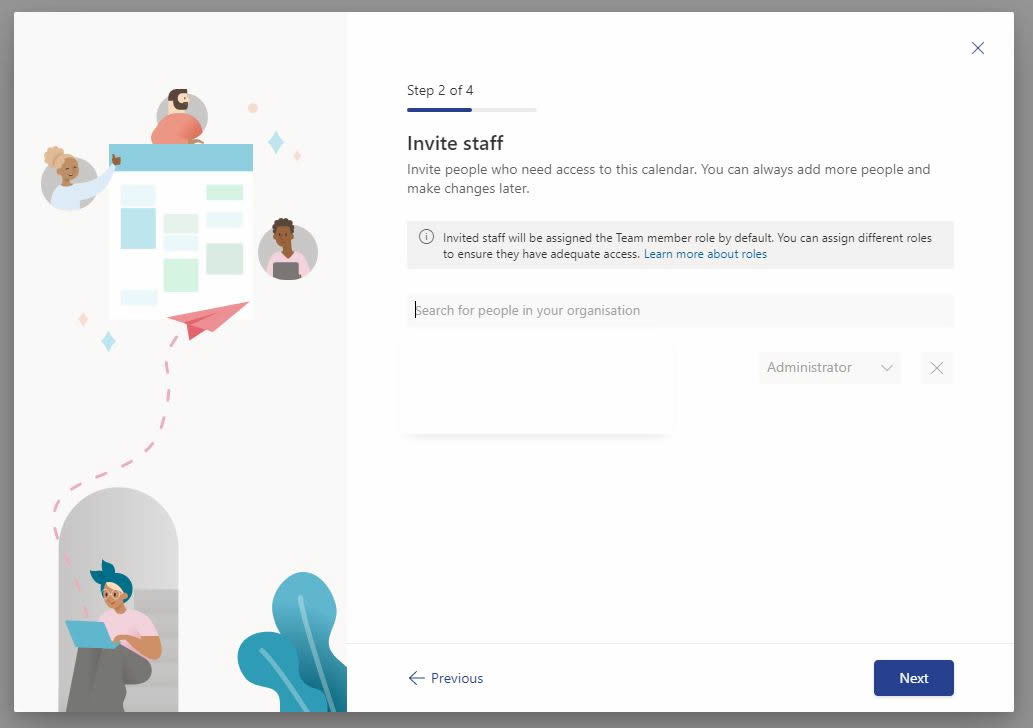
After that you’ll be given the option to add other team members to your calendar if you wish.
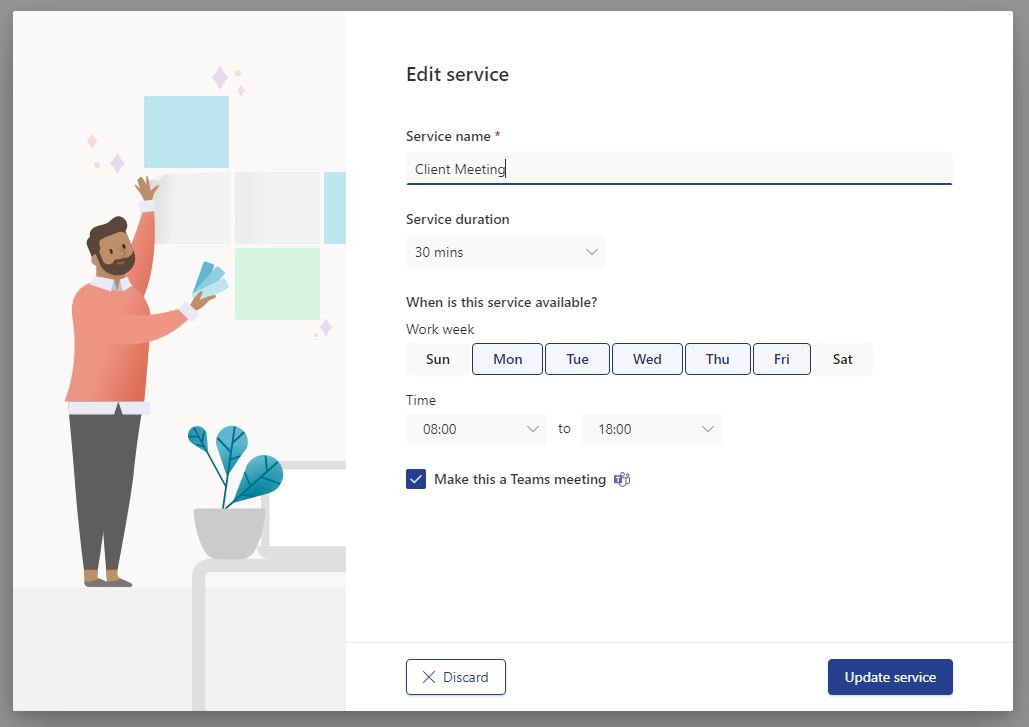
Next, you will create a template for each appointment. This is called a service in Microsoft Bookings. This includes the default name of the appointment, duration, available hours and if you want to make it a Teams meeting by default.
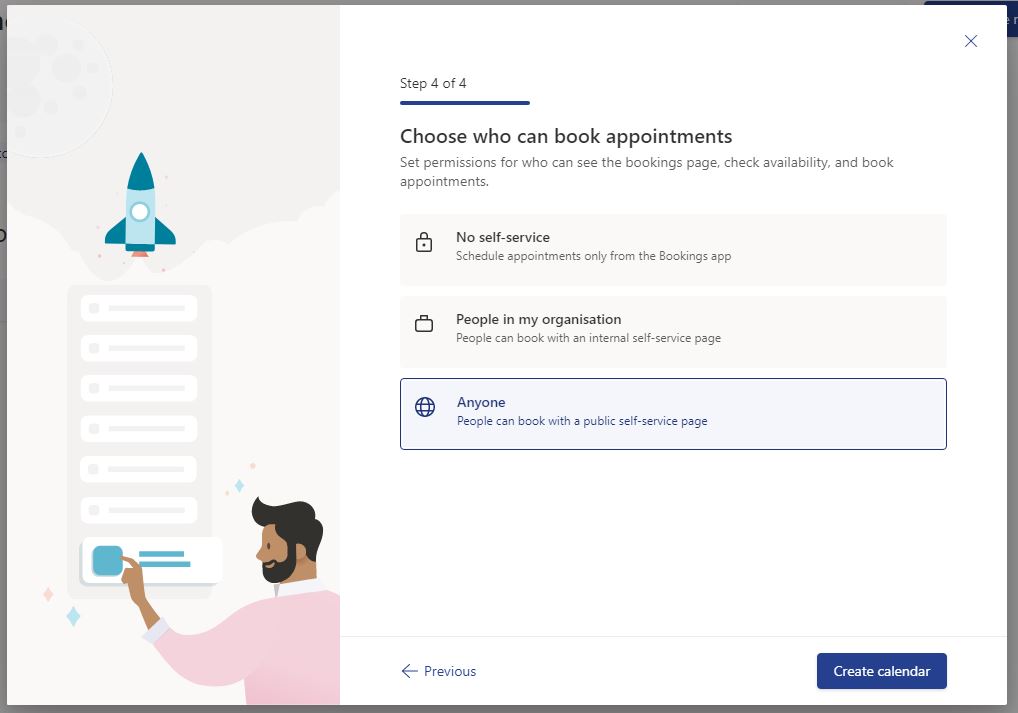
The final step is choosing who can book appointments. You can choose to limit appointments only to the bookings app, to everyone in your company or make it publicly accessible to everyone. If you want to allow your clients to be able to book time with you, make sure to set this to ‘Anyone’.
Congratulations you’re ready to go. To allow your clients to start making bookings, select the Booking page from the left-hand menu to access your unique booking link.
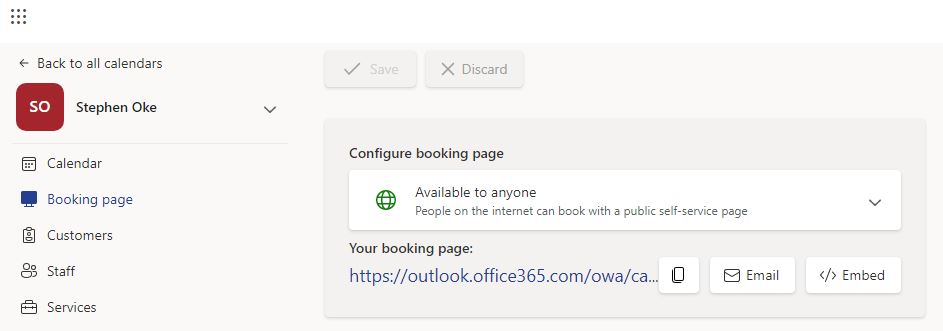
You can now start sharing your booking link with your clients. An ideal place is in your e-mail signature, on social media all your website bio. Now whenever anyone visits that page, they can see what slots you have available and schedule in a booking with you.
You might be asking “how does Bookings know what slots I have free?” This is one of the really nifty features of this app. Because it integrates with Office 365, the app can automatically read your Outlook calendars and will only show times slots where you have free time. This will ensure you do not get double booked.
Is Microsoft Bookings free?
Microsoft Bookings is technically free, however you will need a Microsoft 365 subscription to access it. The Bookings app is available from the lowest price business plan which is Microsoft 365 Business Basic.
What is Microsoft FindTime?
Microsoft FindTime is a simple but powerful app which allows a group of people to choose a suitable meeting time using a quick online poll. It starts by showing a selection of dates and times to all parties, then everyone votes on the times that are best for them. FindTime chooses the ideal time for everyone, books in the meeting and emails everyone to confirm.
How to use FindTime
To use Microsoft FindTime, you will need a business Office 365 subscription. See here for more specific prerequisites.
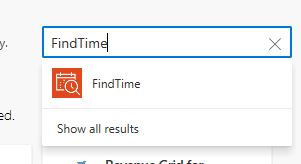
Next you need to install the app. You have two choices – you can either install the app in the web-based or the desktop version of Outlook.
Regardless of which version you wish to use, see these instructions on how to add the app.
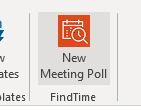
In this example, we’re going to be using the desktop version of outlook. As mentioned above, start by installing the add-in. Go to Home and click the ‘get add-ins’ button on the ribbon.

One successfully added, you will have the ‘New Meeting Poll’ button available in the ribbon when composing an e-mail.
Click the button, making sure you have added all meeting attendees to the email.
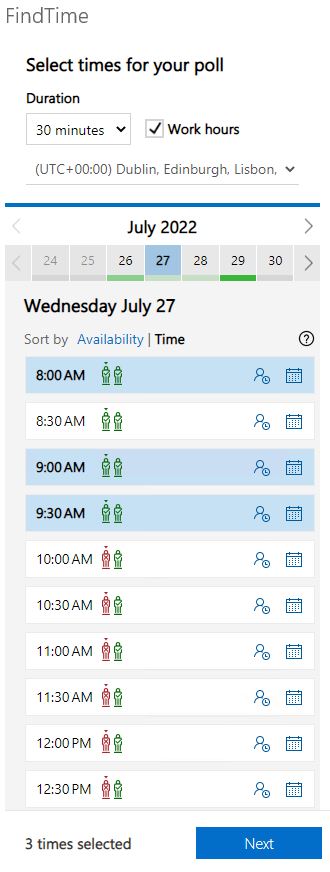
Your FindTime options will now appear on the right. Choose the meeting duration and then click on all the proposed meeting times for your poll and click Next.
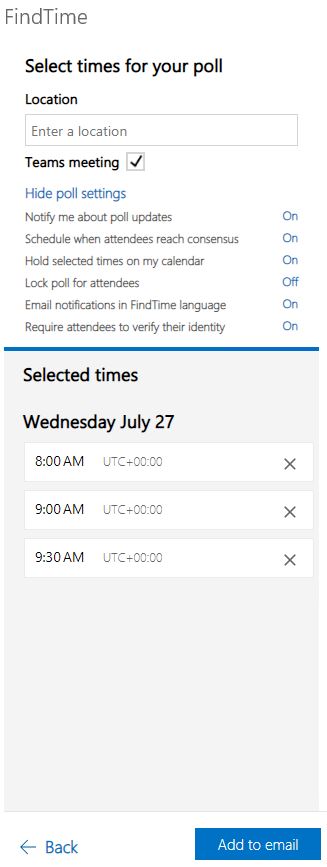
Enter a meeting location and select if you wish this to be a Teams meeting. Finally, click on ‘Add to email’.
Your email will be populated with a meeting invite, which includes a link for all attendees to choose their preferred date and time.
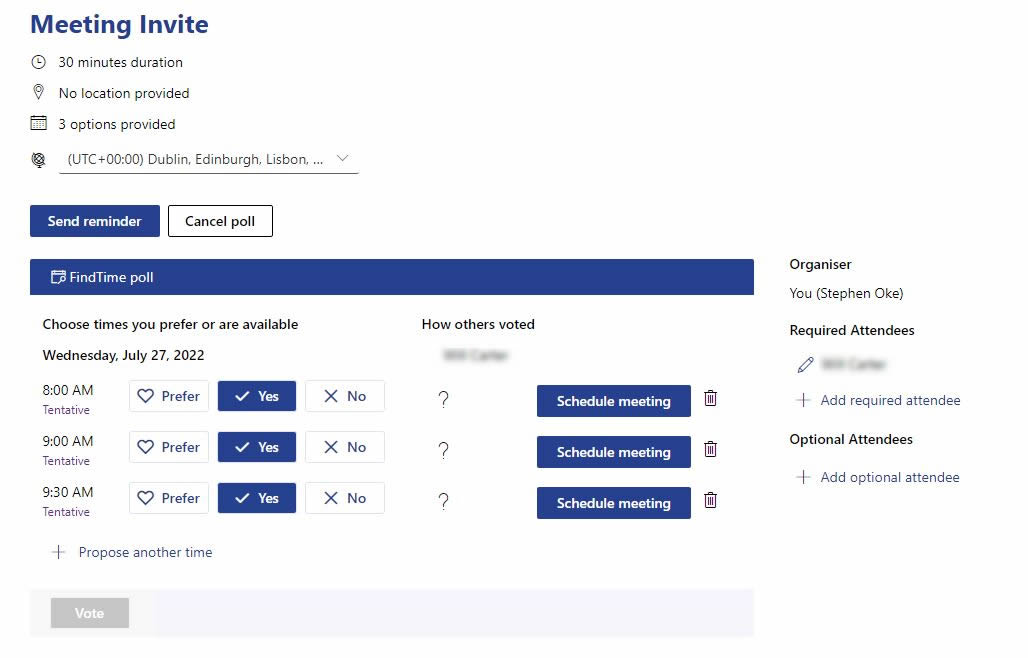
That’s it. Send out the email and then FindTime will do the rest. Once everyone has voted, it will propose the best time for the meeting and email all attendees.
Is FindTime free?
Like with Microsoft Bookings, FindTime is free but only available with a business Office 365 account.
Summary
Hopefully this has been a useful guide on how to significantly reduce your time scheduling meetings. For any companies already using the Microsoft ecosystem, these are two excellent options that are definitely worth checking out further.