
Office 365 now offers the ability to send encrypted emails, which is a fantastic way of securely sending any sensitive or confidential information via email. Here is how you enable the feature and start sending out encrypted emails in only a few steps.
What is email encryption?
Email encryption is a way of protecting the contents of an email message. This utilises technology such as TLS (Transport Layer Security) to achieve the encryption.
Why would I want to use it?
Email encryption is not necessarily required for every email that you send (although this is possible to configure), this functionality is particularly useful for sending out sensitive information such as passwords, login details, sensitive company information, intellectual property and finance details. The email encryption protects the contents of the email and prevents the recipient forwarding the email on or copying the contents out of the email.
How do I send an encrypted email in Office 365?
The process of sending an encrypted email in Office 365 is actually very simple and doesn’t require any particular technical knowledge. Here is the process of how to send your first encrypted email.
Outlook Web App
If you access your Office 365 email via the browser using the app, follow these steps.
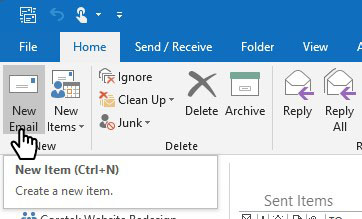
Make sure you have the Outlook open and click on New to compose a new email.
As long as email encryption has been enabled for your tenant, you should see a Protect button.

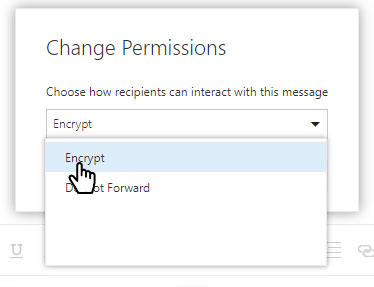
A grey bar will appear informing you that the email is now protected. If you wish to change the level of protection, click on the Change Permissions link.

You will have various options for protection, including Encrypt. If you simply want to encrypt the email, this option is fine. However, if you require additional security in addition to the encryption such as stopping the recipient forwarding the email on, these options are also available.
Here is a useful guide on the differences between the various settings.
Outlook 2016
Users of the Outlook 2016 application will need to go through a slightly different process. Again, encryption will need to be enabled by your system admin or these options will not be visible.
Start by clicking on New Email to compose a new email.
In the window for the new message, click on File and Properties.
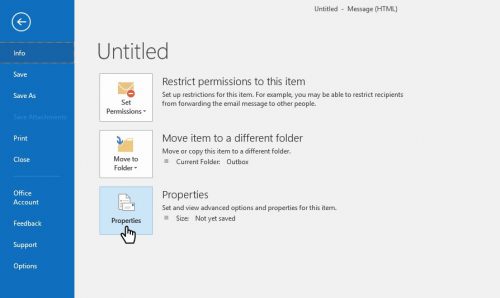
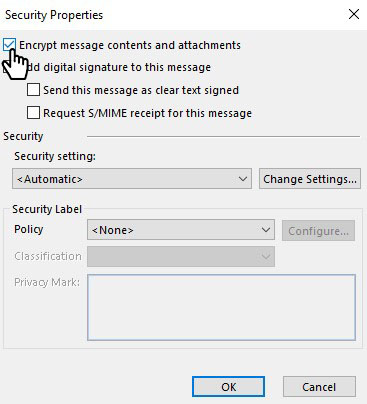
Click on Security Settings…
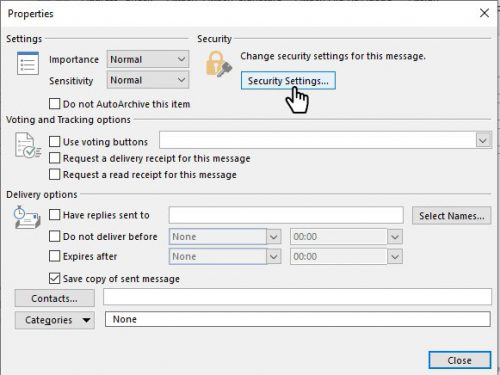
Tick the checkbox for Encrypt message contents and attachments.
Compose and send the email as usual.
How do I enable email Encryption for my company’s Office 365 account?
As mentioned, this functionality will need to be enabled in your Office 365 admin settings. Not all versions of Office 365 offer this functionality. According to Microsoft, these versions are eligible:
“Office 365 Message Encryption is offered as part of Office 365 E3 and E5, Microsoft E3 and E5, Office 365 A1, A3, and A5, and Office 365 G3 and G5.” see the FAQ.
If you are unsure if you are covered under your subscription, consult your MSP or pop us an email and we can point you in the right direction.
To enable email encryption for your Office 365 account, you will need to sign into your Office 365 admin portal as a Global Administrator. From here, you need to enable the Azure Rights Management. This is straightforward and the steps can be found here.
Note that if you signed up for your Office 365 subscription from February 2018, this may already be enabled by default.
Once the above has been completed, all of your Office 365 users should be ready to go. Happy encrypting!